


Bloodhound is one of those tools which is dedicated for red teaming or offensive security operations. But that does not mean that blue teams can’t use it for their defensive purposes. In this blog article we will cover the following:
What is bloodhound and how can we use it
Brief overview of how it works
A practical usage through a sample scenario (for both read and blue teams)
This is going to be a quick ride into the tool and will get you started with the basics, so without further ado … let’s roll!
Introduction
BloodHound is a tool built by SpectreOps, purpose of which is to assess Active Directory security and identify privilege escalation paths. By this it is pretty obvious that it would be popular among the Red Team and penetration testers, making their work easier by enumerating attack vectors and identifying Active Directory relationships.
It is an open-source tool released under the Apache 2.0 License. Currently it has two separate repositories. One contains the legacy version of BloodHound which is due to be archived soon and the other is the latest community edition. The legacy version is a desktop application built on Electron.js while the Community Edition is a redesigned web application. Both these versions differ a lot in the number of features and capabilities.
In case of any problems, you can always go visit the wiki or if you feel like talking to someone you can get into their slack server or create a new github issue.
If that sounds cool then look at how it works under the hood.
How Does BloodHound Work?
Before we look into anything, we need to understand what an Active Directory is. It is a directory service developed by Microsoft that manages users, computers, and resources within a Windows domain network. It acts as a centralized database for organizations, making it easier to manage permissions, security settings, and user access across the entire IT environment.
That sounds pretty important, and it actually is. It allows system administrators to manage and control users, devices, and policies from a single place.
📌 From here on out I am going to refer to Active Directory as AD for short
If you are coming from Linux (just like I am), you might be familiar with Lightweight Directory Access Protocol (LDAP). AD is simply Microsoft’s version of LDAP but with more integrated features like Kerberos authentication, Group Policy, and centralized management. They can’t do anything without making it bloat-ware do they?
Think of Active Directory as a centralized directory service for managing users, computers, and resources in a Windows environment. It's like having a network-wide /etc/passwd and /etc/group, but with more complex relationships and controls.
That is all I am going to explain about AD, but fear not. If you want to pursue this topic further then Official Microsoft Docs would be the best place to go.
BloodHound uses graph theory to visualize and analyze relationships within an AD environment. In case you missed your graph theory class then here is a brief overview:
Graph theory is the study of nodes (also called vertices) and edges (connections between nodes). In the context of Active Directory (AD), graph theory helps map out relationships between users, computers, groups, and permissions, each of which is treated as a node in a graph and their relationships such as access rights, group memberships and login permissions are represented as edges. You are absolutely correct if you guessed that we can use it in privilege escalation.
BloodHound uses Cypher queries (similar to SQL but for graphs) to identify relationships and potential attack paths.
Ok enough with the off-topic lectures, let’s see step by step how it works:
1. Data Collection with SharpHound
BloodHound makes use of SharpHound (also by SpectreOps), a Windows-based data collection tool written in C#, to gather information from an AD environment. SharpHound collects data such as:
Users and Groups
Computer Objects
Session Information
ACLs (Access Control Lists)
Kerberos Ticket Information
To collect data, a Red Team operator can run SharpHound in different collection modes:
SharpHound.exe -c All
This command collects all available AD data and stores it in JSON files.
📌 This is not something you would need to do by the way. The web interface it provides, is pretty neat and is very user friendly.
2. Importing Data into BloodHound
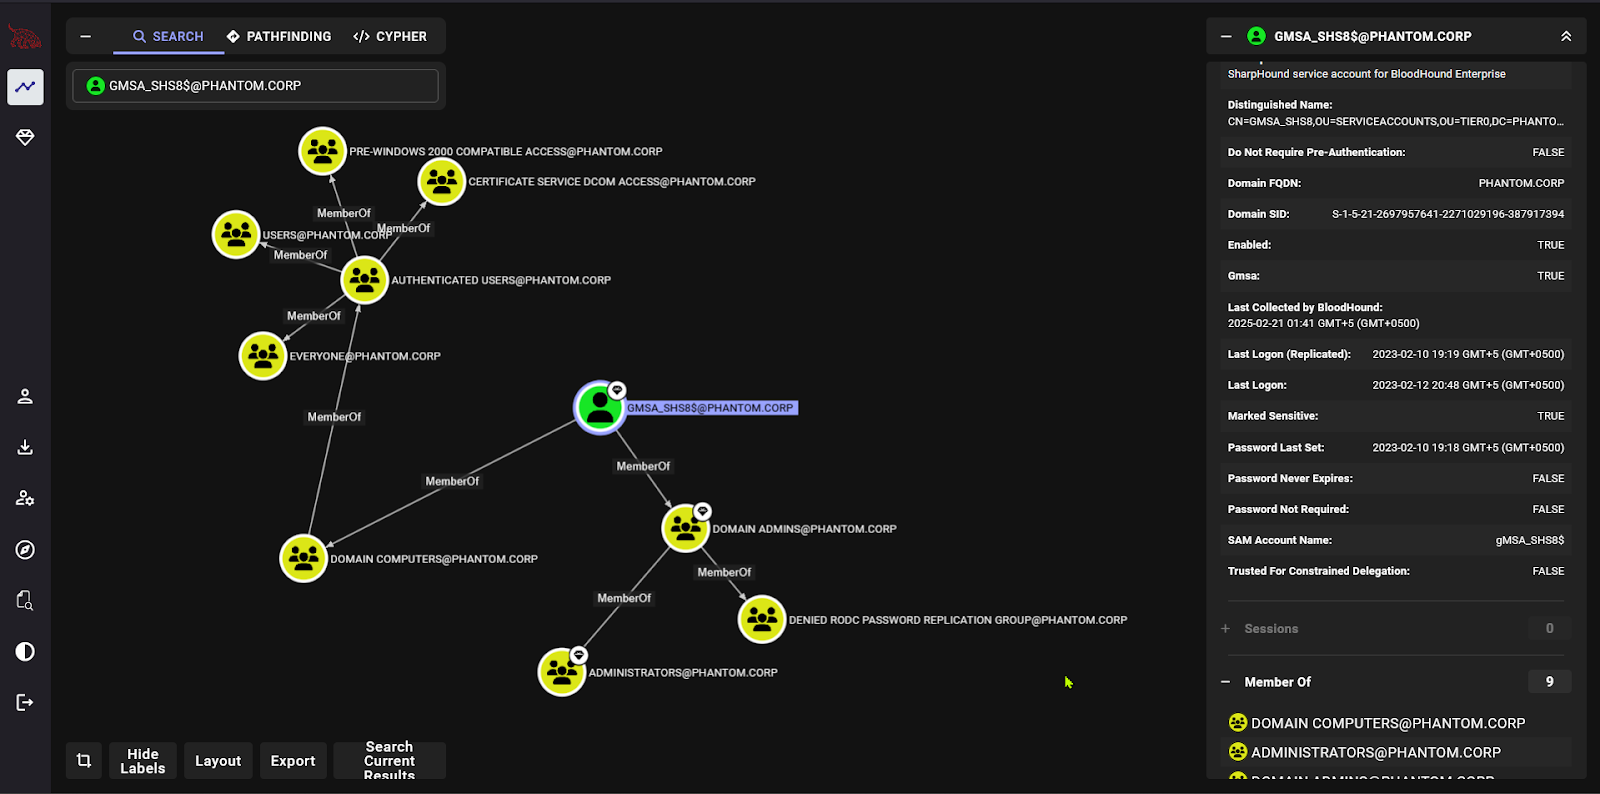
Once the data is collected, it is imported into the BloodHound interface, which uses Neo4j as its backend database. After importing, the collected data is visualized in an interactive graph.
3. Analyzing Attack Paths
BloodHound provides built-in queries to help analyze the AD environment. Some useful queries include:
Find Shortest Paths to Domain Admins
List Users with Kerberoastable SPNs
Find Computers where Users Have Admin Access
Identify Users with Unconstrained Delegation
For example, a Red Team operator can use the pre-built query "Find Shortest Path to Domain Admin" to locate privilege escalation paths.
📌The queries themselves are written as Cypher queries as mentioned above. So the syntax is somewhat similar to SQL.
Common Attack Scenarios Using BloodHound
Alright here is the fun part. Let’s look at some common scenarios. Of course you are free to improvise.
1. Finding Privileged Users
Attackers use BloodHound to identify users with high privileges and analyze their group memberships to find paths to domain admin privileges.
2. Kerberoasting Attacks
Kerberoasting is a post-exploitation attack technique that attempts to obtain a password hash of an Active Directory account that has a Service Principal Name (“SPN”).
Once you identify SPNs associated with service accounts, it can be targeted for Kerberoasting attacks.
Look it up if you want to know more about Kerberoasting. You will love it.
3. Identifying Lateral Movement Paths
Lateral movement is crucial for attackers after gaining an initial foothold. BloodHound reveals which computers a user can access, helping attackers move across the network.
4. Exploiting Weak ACLs (Access Control Lists)
BloodHound uncovers misconfigured ACLs that allow low-privileged users to escalate privileges by modifying user or group memberships.
That was all nice and neat. But let’s look at some defensive measures against BloodHound for the Blue Team before we conclude.
Defending Against BloodHound Attacks
Since BloodHound is such a powerful tool, organizations must take steps to mitigate its effectiveness. Some defensive strategies include:
Least Privilege Principle 👉 Restrict user permissions to the bare minimum.
Monitor SharpHound Activity 👉 Detect unusual LDAP queries and PowerShell script execution.
Disable Unnecessary Protocols 👉 Block LAPS, SMB, and NTLM authentication if not required.
Regularly Audit AD Permissions 👉 Use AD security tools to assess and remove excessive permissions.
Implement MFA (Multi-Factor Authentication) 👉 Protect privileged accounts from unauthorized access.
Conclusion
BloodHound is an essential tool in every Red Team's arsenal, offering unparalleled visibility into Active Directory environments. While it is a powerful offensive security tool, defenders can also use it to proactively identify weaknesses before attackers exploit them. Understanding how BloodHound works is crucial for both attackers and defenders to strengthen overall security posture.
By using BloodHound wisely, organizations can stay ahead of adversaries and secure their Active Directory infrastructure effectively.
If you liked what you read and want us to publish more content like this, then please give it a ♥️ and comment if you have any questions or wisdom to share. Follow us to keep yourself updated with more content. We like to make our readers happy. Happy Hacking!